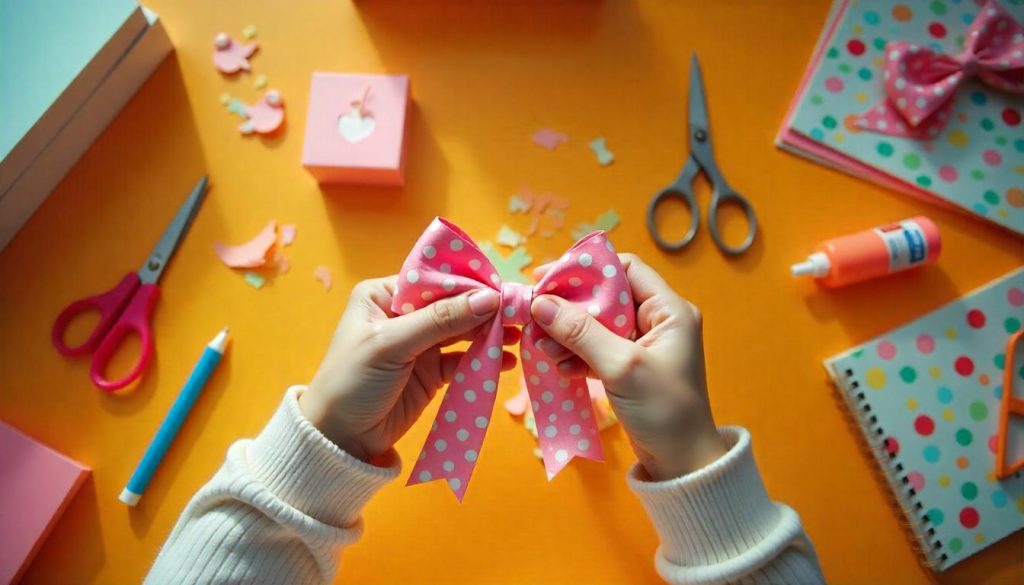
Making paper bows is a simple and beautiful craft that can be used for gift wrapping, party decorations, greeting cards, scrapbooking, or just a fun DIY project. In this guide, you’ll learn how to make paper bows using different techniques — from the classic bow tie style to layered bows and origami styles.
Whether you’re a beginner or an experienced crafter, you’ll find the right tutorial here.
Contents
- Why Make a Paper Bow?
- Materials You’ll Need
- Basic Bow with Paper: Classic Shape
- Origami Paper Bow
- Layered Paper Bow
- Bow with Tails
- Mini Paper Bows for Cards and Scrapbooking
- Creative Paper Choices
- Printable Bow Templates
- Tips and Tricks for Perfect Paper Bows
- How to Use Your Paper Bow
- DIY Paper Bow Variations
- Common Mistakes to Avoid
- FAQs About Making Paper Bows
- Final Thoughts
Why Make a Paper Bow?
Paper bows are elegant, versatile, and budget-friendly. Here’s why you should consider making your own:
Cost-Effective and Eco-Friendly
Paper is inexpensive and widely available. You can even recycle used wrapping paper, newspaper, magazine pages, or old books to make bows.
Customizable for Any Occasion
From birthdays to weddings, holidays to baby showers, you can tailor the paper and style of your bow to suit any theme or mood.
Fun DIY Craft Activity
Making paper bows is a calming and satisfying hobby that can be enjoyed alone or as a group activity with kids, friends, or students.
Materials You’ll Need
Before you begin, gather the following supplies:
- Colored or patterned paper
- Scissors
- Glue stick or double-sided tape
- Ruler
- Pencil
- Templates (optional)
- Bone folder (for clean creases)
- Stapler (optional)
Basic Bow with Paper: Classic Shape
This is the most traditional paper bow style and a great starting point.
Step-by-Step Instructions
Step 1: Choose Your Paper
- Use a standard A4 or 8×8 scrapbook sheet.
- Lightweight cardstock or craft paper works best.
Step 2: Cut the Paper
- Cut three strips:
- 2 strips: 6 inches by 1 inch
- 1 strip: 4 inches by 1 inch
Step 3: Form Loops
- Take the two longer strips and create loops by bringing both ends to the center.
- Glue or tape them in place.
Step 4: Layer the Loops
- Cross the two loops over each other to form an “X”.
- Secure with glue.
Step 5: Add the Center
- Take the smaller strip and wrap it around the center of the bow.
- Secure the back with tape or glue.
Step 6: Let It Dry
- Allow the glue to set before using your bow.
Origami Paper Bow
If you prefer a no-glue method, origami is the way to go.
How to Fold an Origami Bow
Step 1: Prepare Your Paper
- Use a square sheet (15cm x 15cm is ideal).
Step 2: Make the Base Folds
- Fold the paper in half vertically and horizontally.
- Fold diagonally in both directions.
Step 3: Create the Inner Layers
- Collapse the folds to make a triangle base (waterbomb base).
Step 4: Form the Bow Shape
- Fold flaps downward to make the loops.
- Adjust the folds to create a clean bow shape.
Step 5: Flatten and Shape
- Flatten and press all folds to lock in the shape.
- You can add a small square of paper in the center for a 3D look.
Layered Paper Bow
Layered bows add depth and are great for gifts and decor.
How to Make a Layered Bow
Step 1: Cut the Pieces
- Cut 3-4 strips of paper in decreasing lengths (e.g., 7″, 6″, 5″, 4″).
- All should be about 1″ wide.
Step 2: Create Loops
- Fold each strip into a loop.
- Glue or staple the ends together.
Step 3: Layer and Stack
- Start with the largest loop at the bottom.
- Stack each smaller loop on top and secure with glue.
Step 4: Add the Center Knot
- Use a small paper strip or circle to cover the center and secure all layers.
Bow with Tails
Add some tails for a more decorative or festive look.
How to Make a Paper Bow with Tails
Step 1: Make the Bow Loops
- Follow the same steps for the classic or layered bow.
Step 2: Cut the Tails
- Cut a strip about 6″ long and 1″ wide.
- Cut a V shape on both ends for a ribbon-like finish.
Step 3: Assemble
- Glue the tails to the back of your bow before adding the center wrap.
Mini Paper Bows for Cards and Scrapbooking
These tiny bows are perfect for smaller projects.
Easy Way to Make Mini Bows
Step 1: Use Small Paper Pieces
- Cut your paper into strips no more than 3″ long and ½” wide.
Step 2: Create Tiny Loops
- Fold each strip into a loop with overlapping ends.
- Secure with glue.
Step 3: Stack and Finish
- If desired, stack multiple loops.
- Use a thin center strip to wrap and finish the bow.
Creative Paper Choices
Using unique paper materials can elevate your bow’s appearance.
Types of Paper You Can Use
- Wrapping paper: Easy to fold and comes in various designs.
- Scrapbook paper: Thick and durable.
- Newspaper or book pages: Great for vintage or literary themes.
- Magazine pages: Glossy finish adds flair.
- Origami paper: Designed for precise folding.
Printable Bow Templates
Using templates makes the process quicker and cleaner.
Where to Find Templates
You can find free bow templates online in:
- Pinterest boards
- Craft blogs
- DIY websites like Canva or Etsy (for printable downloads)
Print the template on sturdy paper and trace onto your chosen material.
Tips and Tricks for Perfect Paper Bows
Improve your paper bow-making with these expert tips.
Score Your Paper
Use a bone folder or blunt knife to make clean creases before folding.
Double-Sided Designs
Use double-sided paper for a more professional, finished look.
Mix and Match
Use patterned and solid color paper for contrast and uniqueness.
Add Embellishments
Decorate with:
- Glitter
- Rhinestones
- Stickers
- Washi tape
- Calligraphy initials
How to Use Your Paper Bow
Now that you’ve made your bow, here are ways to use it creatively.
Gift Wrapping
Attach to the top of a gift box or bag with tape or glue dots.
Greeting Cards
Glue a small bow to handmade or printed cards for extra flair.
Scrapbooking
Use bows to frame photos or as accents in your layouts.
Home Decor
String multiple paper bows together for a party garland or nursery decor.
Fashion Accessories
Attach to a hair clip or headband as a cute handmade embellishment.
DIY Paper Bow Variations
Switch things up with these fun variations.
Accordion Fold Bow
Fold a strip of paper back and forth (like a fan), then pinch in the center and secure.
Rosette Bow
Make a circular rosette using pleated paper, then add a small bow shape on top.
Heart-Shaped Bow
Cut your loops into heart shapes for Valentine’s Day or romantic events.
Common Mistakes to Avoid
Avoid these pitfalls to ensure your paper bows turn out beautifully.
Using Thick Paper
Heavy paper doesn’t fold easily and can tear or crumple.
Too Much Glue
Excess glue can cause the paper to warp or get soggy.
Poorly Measured Strips
Uneven strips result in unbalanced bows.
FAQs About Making Paper Bows
How long does it take to make a paper bow?
About 5–10 minutes per bow, depending on style and skill level.
Can I reuse a paper bow?
Yes, if handled gently. Use glue dots or removable tape for easier reuse.
Can I make bows without templates?
Absolutely. Templates just save time but aren’t required.
What’s the best paper size for beginners?
Start with 6″ x 6″ or A4 for more manageable folds.
Do I need a glue gun?
A glue stick or double-sided tape is usually sufficient.
Final Thoughts
Making a paper bow is a satisfying and useful DIY skill that anyone can learn. Whether you want to wrap a thoughtful gift, personalize a card, or simply enjoy a creative afternoon, paper bows are the perfect craft project.
With a little practice and creativity, you can design bows in every shape, size, and style. So grab your paper and scissors and start folding today!