Are you tired of a closet full of tons of outdated fabrics? Can’t decide what to do with them? We have just the solution for you. How about painting them with chalk paint and upcycling them for various DIY home decor projects? They will surely add a touch of your artsy personality to your everyday home decor.
Okay, upcycling the fabric is fixed and they are saved from being the decorations of ‘Oscar the Grouch’! But how to paint fabric with chalk paint? And where to start?
No worries, this step-by-step guide is here to help. It’s got all the answers. Follow this quick guide to find out your answers and learn the art of painting fabrics with chalk paints.
Contents
Things You Will Need
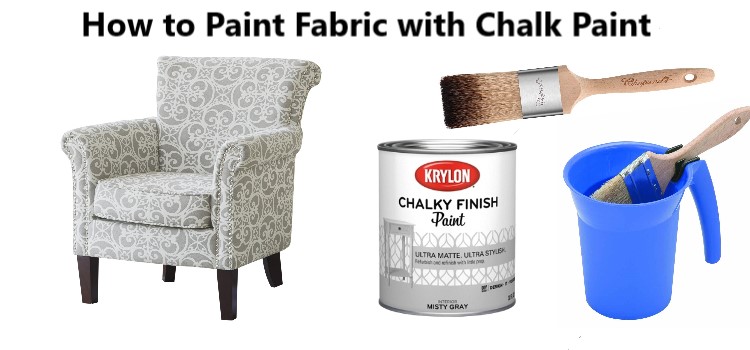
Before we dive into the nitty-gritty of painting fabrics with chalk paint, we need some supplies for the job. Collect the supplies below to start turning those lifeless fabrics into dreamy DIY decors.
- Chalk-style paints
- Fabric medium
- Paintbrushes
- Spray bottle
- Water
- Painter’s tape
- A paint pan
- Clear wax
- Wax brush or cloth
Read Next: Some Fabric Painting Techniques for Beginners
Choosing the Right Fabric
Choosing the right fabric is the first step for painting any fabric with chalk paint. So, which type of fabric is ideal for painting? Well, a fabric that is used on rare occasions would be the best selection for painting it with chalk paint. Avoid the fabrics that are used regularly.
Also, a piece of fabric that does not have a deep texture and contains more decorative functions is recommended. Fabrics with more texture may end up getting a little stiff with paint. So, instead of choosing a fabric with more texture, go for cotton blends, silks, or linens.
Still, if you can’t just leave your favorite fabric with a textured pattern, after painting it you will see it as a beautiful artwork too. But if the pattern is merely printed cotton, you don’t need to worry at all because it will be covered with the paint.
Choosing the Right Colors
Once you are happy with your selected fabric piece, you can move on to selecting the paint color. When it comes to selecting colors, do not compromise on the quality of the paint. Good quality paints will give you satisfactory results as well as a comfortable painting experience.
Another thing is, try to pick colors with lighter hues. Lighter colors always give impressive results. But if you want to bring a touch of pop to any fabric, go for darker, more pigmented colors.
Preparations for Chalk Painting
Alright, choosing and collecting all the supplies for painting is complete. Now, it’s time to prepare the fabric that you are going to use for painting. A point to note is that good preparation is the key to achieving a good finished product. So, here are the things that you should do before you start to paint.
- Remove all sticky residue, wax, or the likes that may cause interference with the paint adhering.
- If you are unable to remove them with just scratching, you can use a mild detergent and a scrub brush to clean off the remaining spots.
- Trim all the unwanted strings that are coming off, if the fabric has lint remove them.
- Use the painter’s tape and tape off the areas where you don’t want to paint.
How to Paint Fabric with Chalk Paint: The Key Steps
All of the prerequisites of painting fabric with chalk paint are done. Now it’s time to jump into the key steps of learning the secrets of painting fabric with chalk paint.
Mixing the Paint:
Take fabric medium and chalk paint in a ratio of 1:2 in the paint pan and mix them well. But you can go without the fabric medium too. To thin the paint a bit, you can use water. In this case, you have to use a water bottle to mist the fabric lightly on the spot you are working.
Simply make the fabric a little bit damp, but don’t overdo it. Damp fabric makes it easier for the paint to glide on. It also helps the paint to easily soak into the fabric.
Painting the Fabric:
Follow a rule of thumb; always apply the paint in an area where people usually don’t see much, like the back or inside. This gives you a chance to cover up mistakes or even tweak the whole process before you get into a rhythm. It will ensure perfection for the overall painting.
- When you are applying paint, it’s more like dyeing the fabric. You have to make sure the paint doesn’t lay on the fabric rather it soaks into the fabric.
- Also, while painting the fabric it’s always better to work in sections. Try your best to maintain your movement along at a good clip. Continue painting the fabric in sections until it is completely painted.
- You can use a wide paintbrush with steady strokes to avoid dry lines. Again, if your fabric is not damped properly you may end up getting lap marks, so, be careful with that.
- If the textured pattern of your fabric has straight lines or something like that, paint it in the same direction. If it has other designs, push the paint into your fabric from different directions.
- Make sure you give the first coat of paint to dry for at least 15-20 minutes. Once it’s dry and you feel like your fabric requires more coats, use thin coats and repeat the process until you are satisfied with the final coat. Always cover the surface evenly.
Let It Rest:
Once you have achieved the satisfactory final coat, it’s time to put your freshly painted fabric to dry for at least 24 hours. Depending on the weather conditions, sometimes it may require more than 24 hours to dry.
But if you place it outside the house on a warm sunny day it might take just a few hours to dry. After drying completely, you can touch up the areas that need a little more coverage. You can remove the painter’s tape now.
Sanding:
When you touch the fabric after it is completely dried, you will find it scratchy and unpleasant. So, what’s the solution?
Well, it’s easy, use sandpapers. Take 220 grit sandpaper and sand the fabric lightly until you feel it’s perfect. Sanding after every coat is not necessary; just on the final coat is sufficient. Don’t forget to remove the dust after sanding. You can use a wet rag to wipe down dust.
Sealing the Paint:
Now, painting the fabric is complete. It’s time to seal the finish because you don’t want your paint to chip off after a few days. You can protect the finish of your painted fabric in different ways. You can follow any of these methods below:
- Place the fabric in the sun for a couple of hours. This will do the job.
- You can use iron to heat seal the paint. It’s a very easy method.
- You can heat seal the paint by tumbling your painted fabric in the dryer on low.
- Sealing the paint by applying a coat of soft wax on the painted fabric. It’s almost the same as applying wax on a wood piece but a little bit lighter.
You are all caught up. Now it’s time for you to build up confidence and start experimenting on different fabrics to get masterpieces out of them.
Wrapping It Up
If you are thinking of upcycling a material, why not give it a try on fabrics first? Fabric will be a canvas for painting with your creative ideas. It is also an inexpensive way of creating artworks from old pieces. Keeping this quick guide in mind, you can easily apply the techniques to any old fabric.
So, before throwing your old fabrics into the dumpster, give them a touch of your creativity with your ‘creativity wand’ and surprise your loved ones with a dramatic change of those dusty old fabrics.